Sep 7th 2018
Your photos contain precious memories and losing photos can be devastating. Which is why you should regularly export and backup your photos.
No matter how many photos you have and or when they have been taken, it's a pretty straight-forward process to export these photos to just about any location desired. And, you can do this without compromising the quality of each treasured photo.
These simple steps will help you get your photos to its new destination.
1. Photo Selection
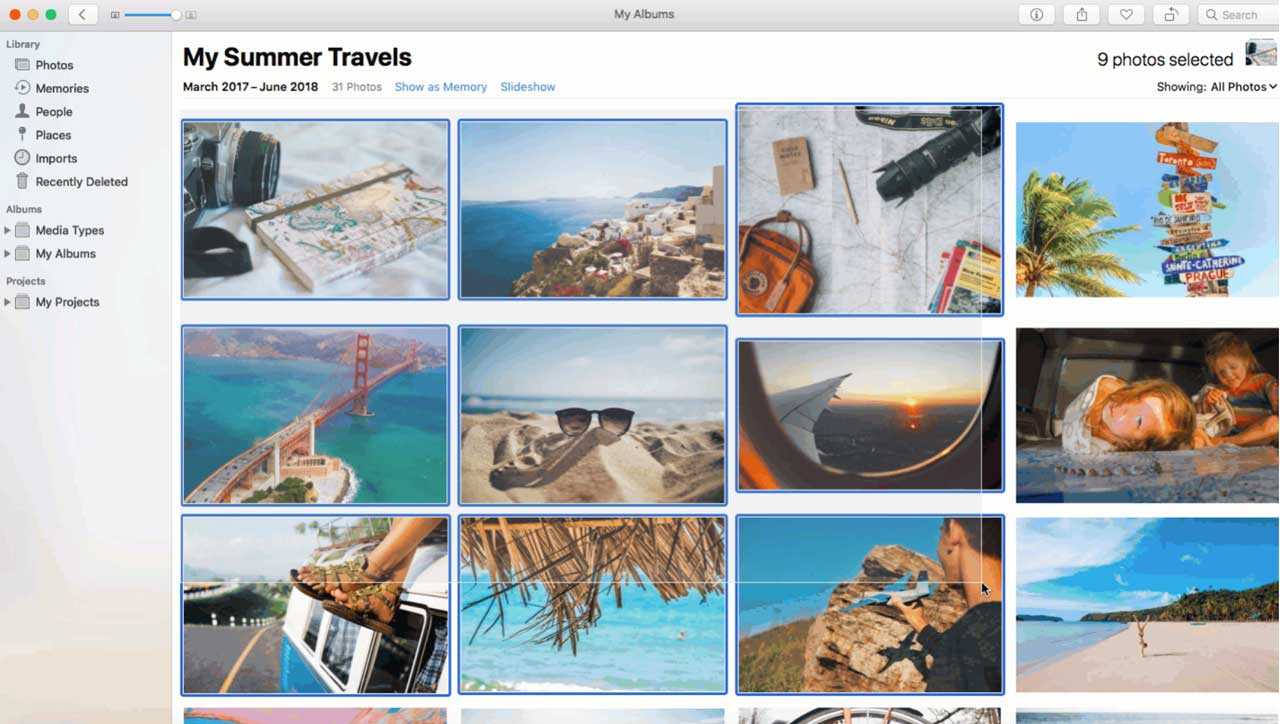
Go to your Apple Photos library and select the albums and photos you wish to transport. To choose multiple photos or albums, hold the Command key while selecting. You can also drag your mouse over numerous photos and albums to select them. You should see a yellow border over each photo/album indicating what you've selected.
Perhaps, you have some images that are only on Instagram and you'd like to access them for future use. You can still select these photos only if you have saved the image to your iPhone, whether you've taken it yourself or others have tagged you.

2. Export Menu
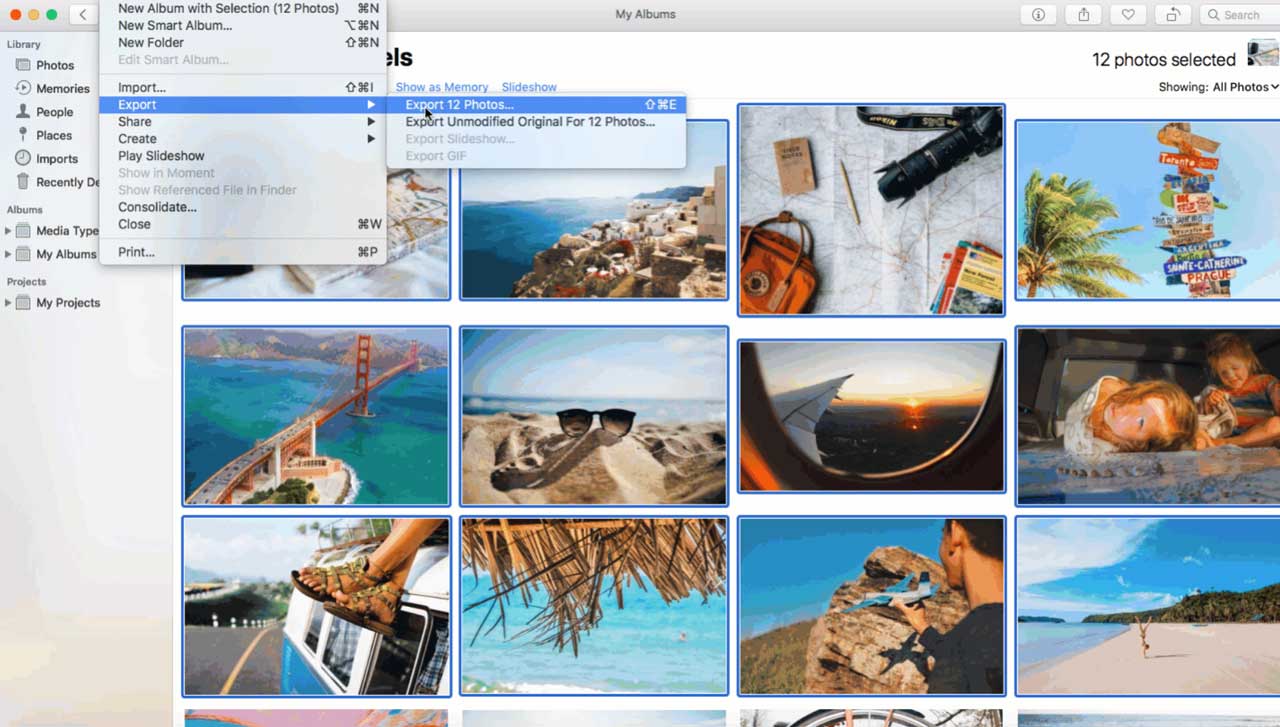
Once you have chosen your photo selection, you should see a File tab on the left-hand corner of your screen.
Scroll down and select Export.

3. Narrow Down
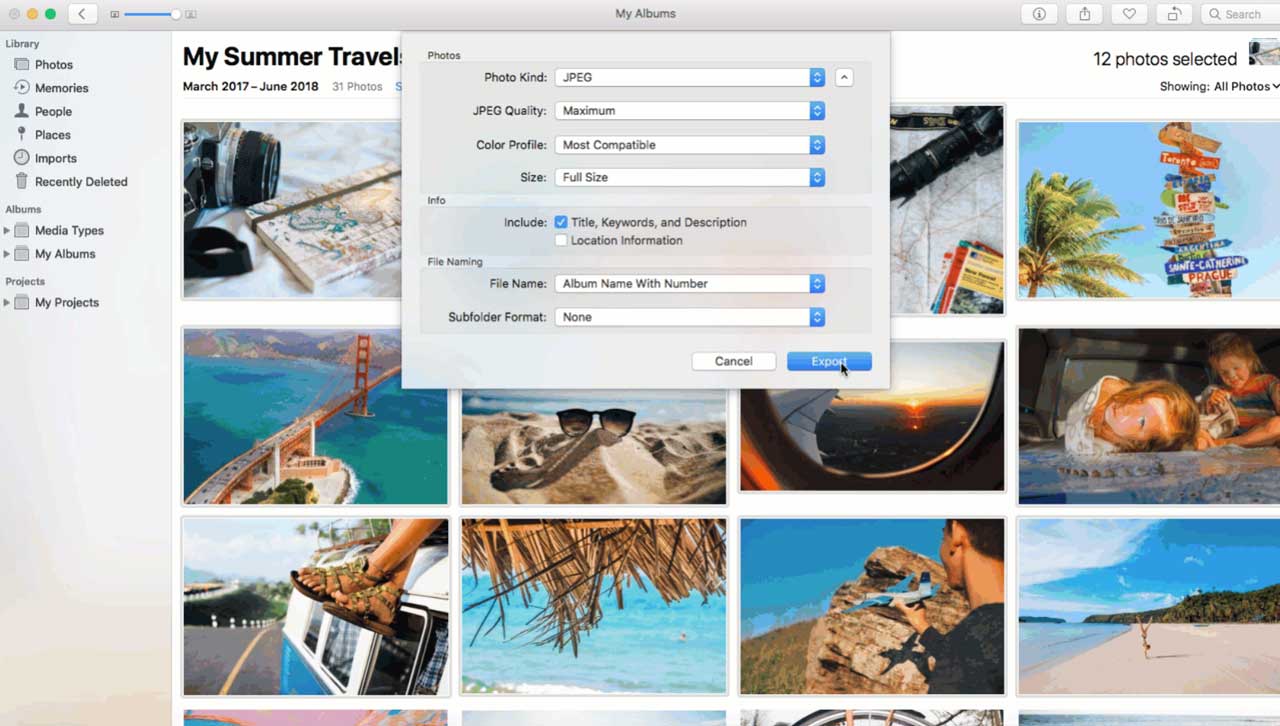
In order to maintain the quality and size of your images, there are 4 elements that you must consider:
- File name
- Size
- JPEG Quality
- Kind
You have the option to rename your file. Or, you can keep the name that you currently have just as long as you remember the file name. Sometimes it's easier to stick with the album or sequential title because they already accompany a number sequence in that file when working with larger batches of photos.

For size, this refers to the desired resolution of the image(s) you choose. To avoid compromising quality and reducing the size of the images, the Full Size option is your best choice.
JPEG Quality is an option only if you've previously chosen to export your photos to JPEG format. What you plan on doing with your photos will impact your choice in quality. Are these for print or digital use?
- Print: If you're considering printing your images, choose the option with maximum quality to ensure that your images maintain their color and quality.
- Digital: Should you need them solely for uploading to the web, medium, or high will do just fine.
Lastly, Kind refers to formats PNG, JPEG, or TIFF in which your images are saved under.
When you're through adjusting and choosing your settings, click the Export button at the bottom right-hand corner of the menu. This will export all of your images, quickly, to your new location.
4. Save Location
Next, you'll want to select a location in which you choose to save your files. You can save it to your Dropbox account, documents, desktop, or any other location in which you'll have easy access.

5. New File Access
Once you've completed all 4 steps and identified the correct location for each image and album, you can access your new file. Now that you've saved them in their new location, you can do what you want with them.
You don't have to lose your images just because this app is nonexistent. Access your images anywhere you please without the worry of lost memories.


